
Planning a family trip can feel difficult if you try to fill every empty slot on the first day before anything else. People may be starting from different places, have different ideas about how far to walk, or need a rest after lunch. To begin, you only need to agree on the travel dates, the times you must keep, and when you will rest together. Add places to that outline one at a time, then share it so the family can find the same plan. The remaining decisions become easier to see.
This guide takes you through creating one trip in Tripop and sharing it with your family. The images are illustrative screens rendered from the current product code, using an example called “Our family trip to Busan” for two nights and three days. The times shown demonstrate how to enter a plan. They do not represent actual train reservations, hotel arrangements, or restaurant bookings.
Before opening the app, ask your family three things
There are a few things to agree on before asking, “Where should we go in Busan?” Find out when everyone can start spending time together, what each person most wants to do, and which kinds of plans would be difficult for them. Rather than assuming that a trip with children must revolve around activities, or that a trip with your parents should be mostly rest, ask everyone. Even within one family, people can have very different ideas about a good day.
Once you have their answers, record the commitments that need to line up. If someone is arriving later, do not include them in plans before their arrival. If someone finds long walks difficult, make room for a break before adding another stop. When a restaurant or activity is still only an option, write that down too. It helps prevent anyone from mistaking a suggestion for a confirmed booking.
| What to agree on first | What to ask your family | What to put in the itinerary |
|---|---|---|
| Joining and leaving | “What time can you join us?” | Meeting time, exact meeting place, and anyone leaving early |
| What people want to do | “What is one thing you really want to do on this trip?” | Options to do together and when to collect everyone's views |
| Rest and other needs | “Is there anything we should allow for when walking or planning meals?” | Breaks, gaps between meals, and how much travel people can manage |
1. Start with a trip name and dates
In Tripop, open Create Trip and choose Create Manually. Give the trip a name your family will recognize, such as “Our family trip to Busan,” rather than just the place name “Busan.” Add Busan under Destinations, choose the Start Date and End Date, and select Family under Trip Type. If you have not agreed on a budget yet, there is no need to force an answer into the optional fields.
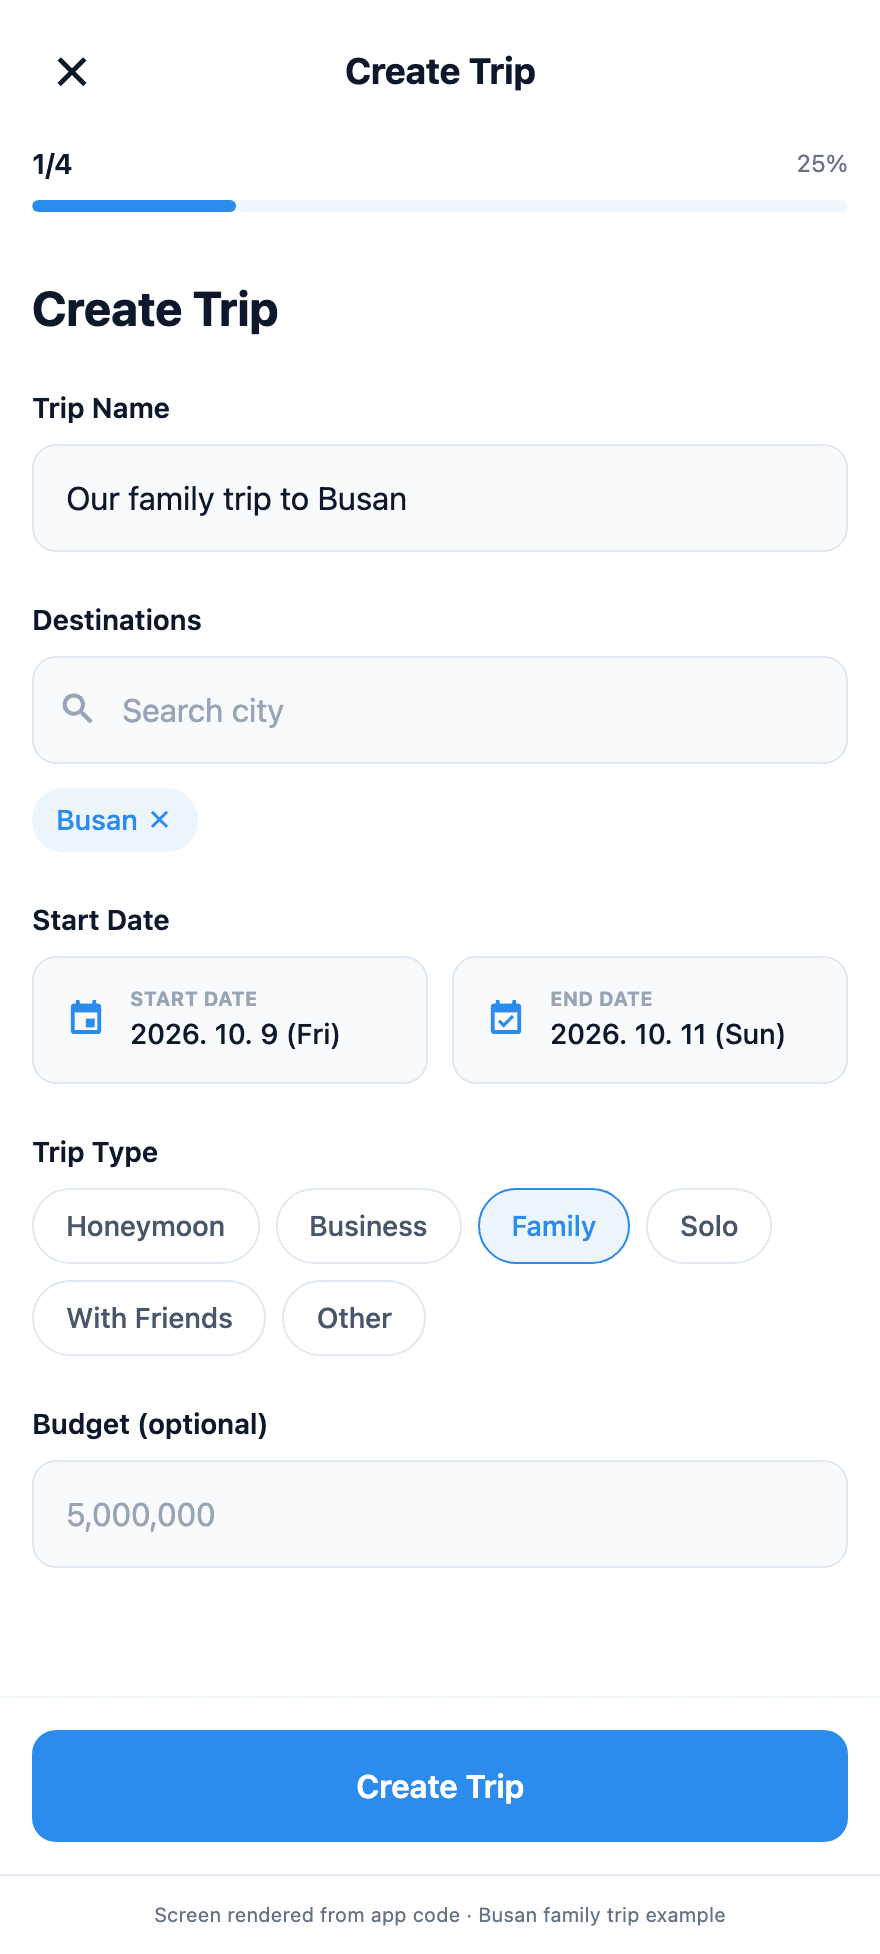
On this screen, check the length of the trip before worrying about individual places. Even if some family members arrive a day later, you can create one trip covering the full period for everyone to refer to, then add a meeting on the day they join. Manually organizing a trip and getting it ready to share are separate steps. To create a share link, the person who created the trip must sign in and sync the trip from the app to the server.
2. Add commitments with fixed times to each day
After creating the trip, open Schedule in the bottom menu, tap the + button, and choose Manual Entry. Select the day and enter an Event Title and start time. Add an end time, place, and memo if needed, then tap Add Event. Instead of entering every attraction at once, begin with the things that require you to be somewhere at a particular time: arrival, a meal you have booked, or an agreement to meet back at the hotel. Other stops can fit around those commitments.
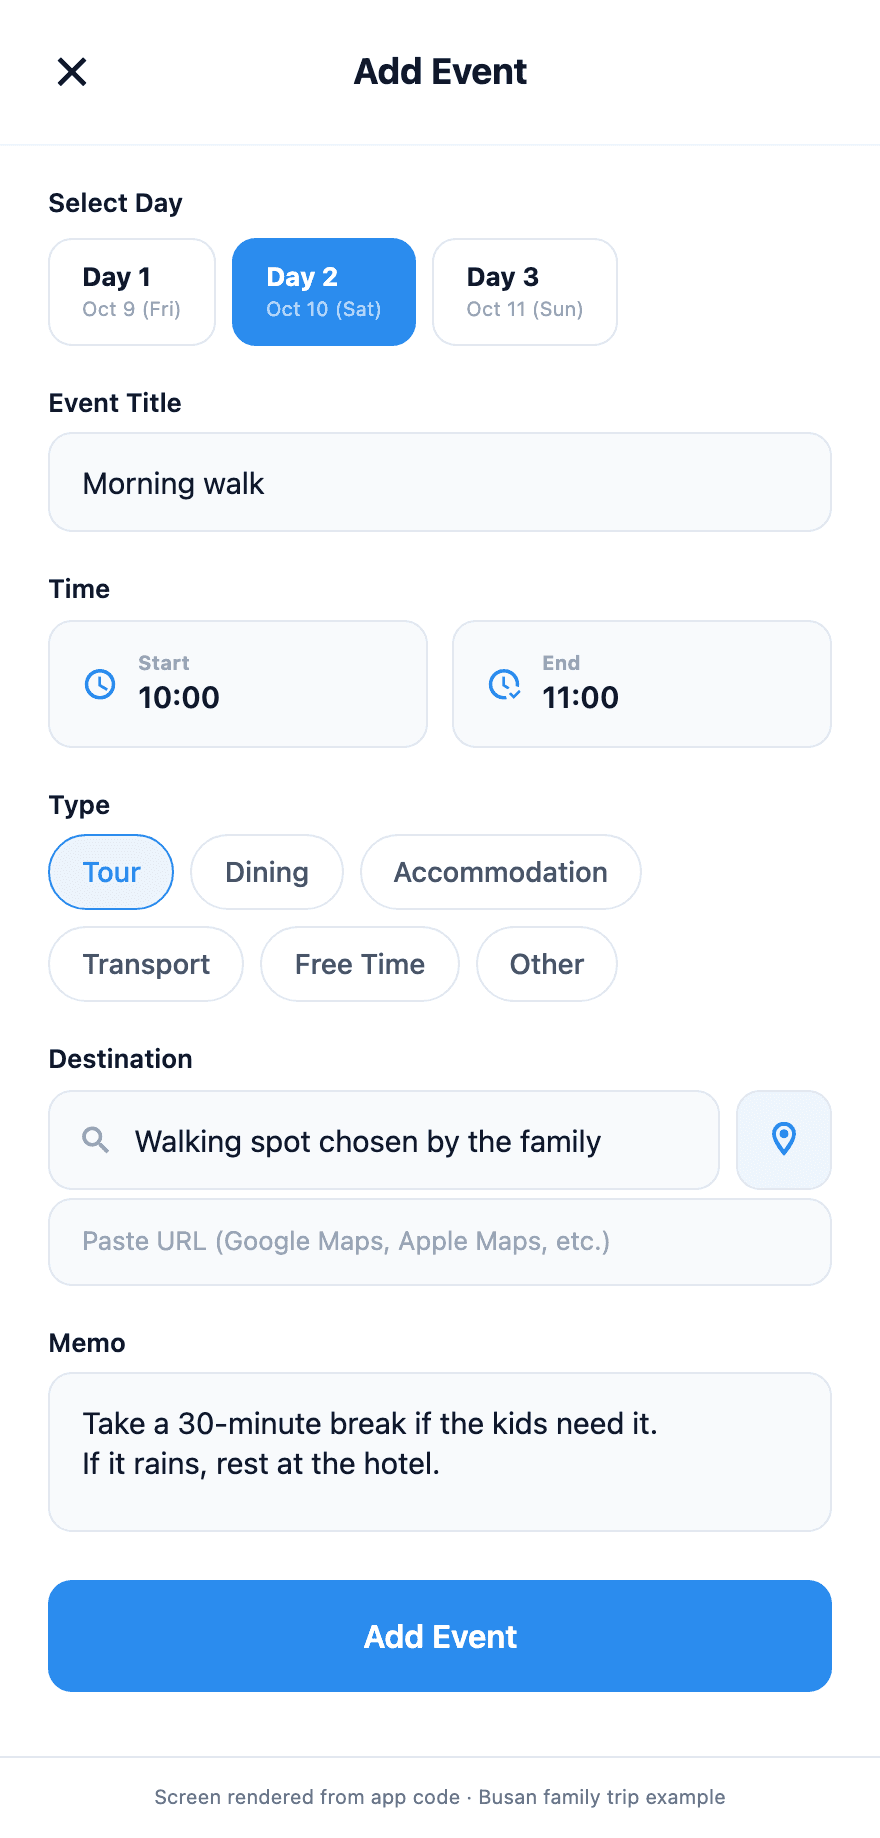
An event title is more useful to your family when it makes the next action clear. Try “Rest at the hotel and meet up again” instead of just “Rest,” or include the confirmed restaurant name rather than writing only “Lunch.” Use the memo for details people are likely to ask about, such as the floor or entrance where you will meet, or who a late arrival should contact. Memos may be visible in the shared itinerary, so leave out booking references or personal information that the whole family does not need.
If you have not booked something yet, write “Option” or “Not booked yet” in the title or memo. Adding it to the app does not make a reservation. When choosing an activity to do together in Busan, first compare age requirements, how each person will get there, and the cancellation terms. Once the family agrees and you have booked, copy the confirmed time into the itinerary.
3. Look through the whole day and check there is time to rest
Once you have a list for each day, read it from top to bottom. If a day has several events, tap its date card to review the full day's details. If the first day includes arrival, lunch, and a rest at the hotel, for example, check whether there is enough time between them to move your bags and get from place to place. A day is not necessarily short just because it lists only three places. The time spent meeting at the station or waiting for a meal also shapes the day your family will actually have.
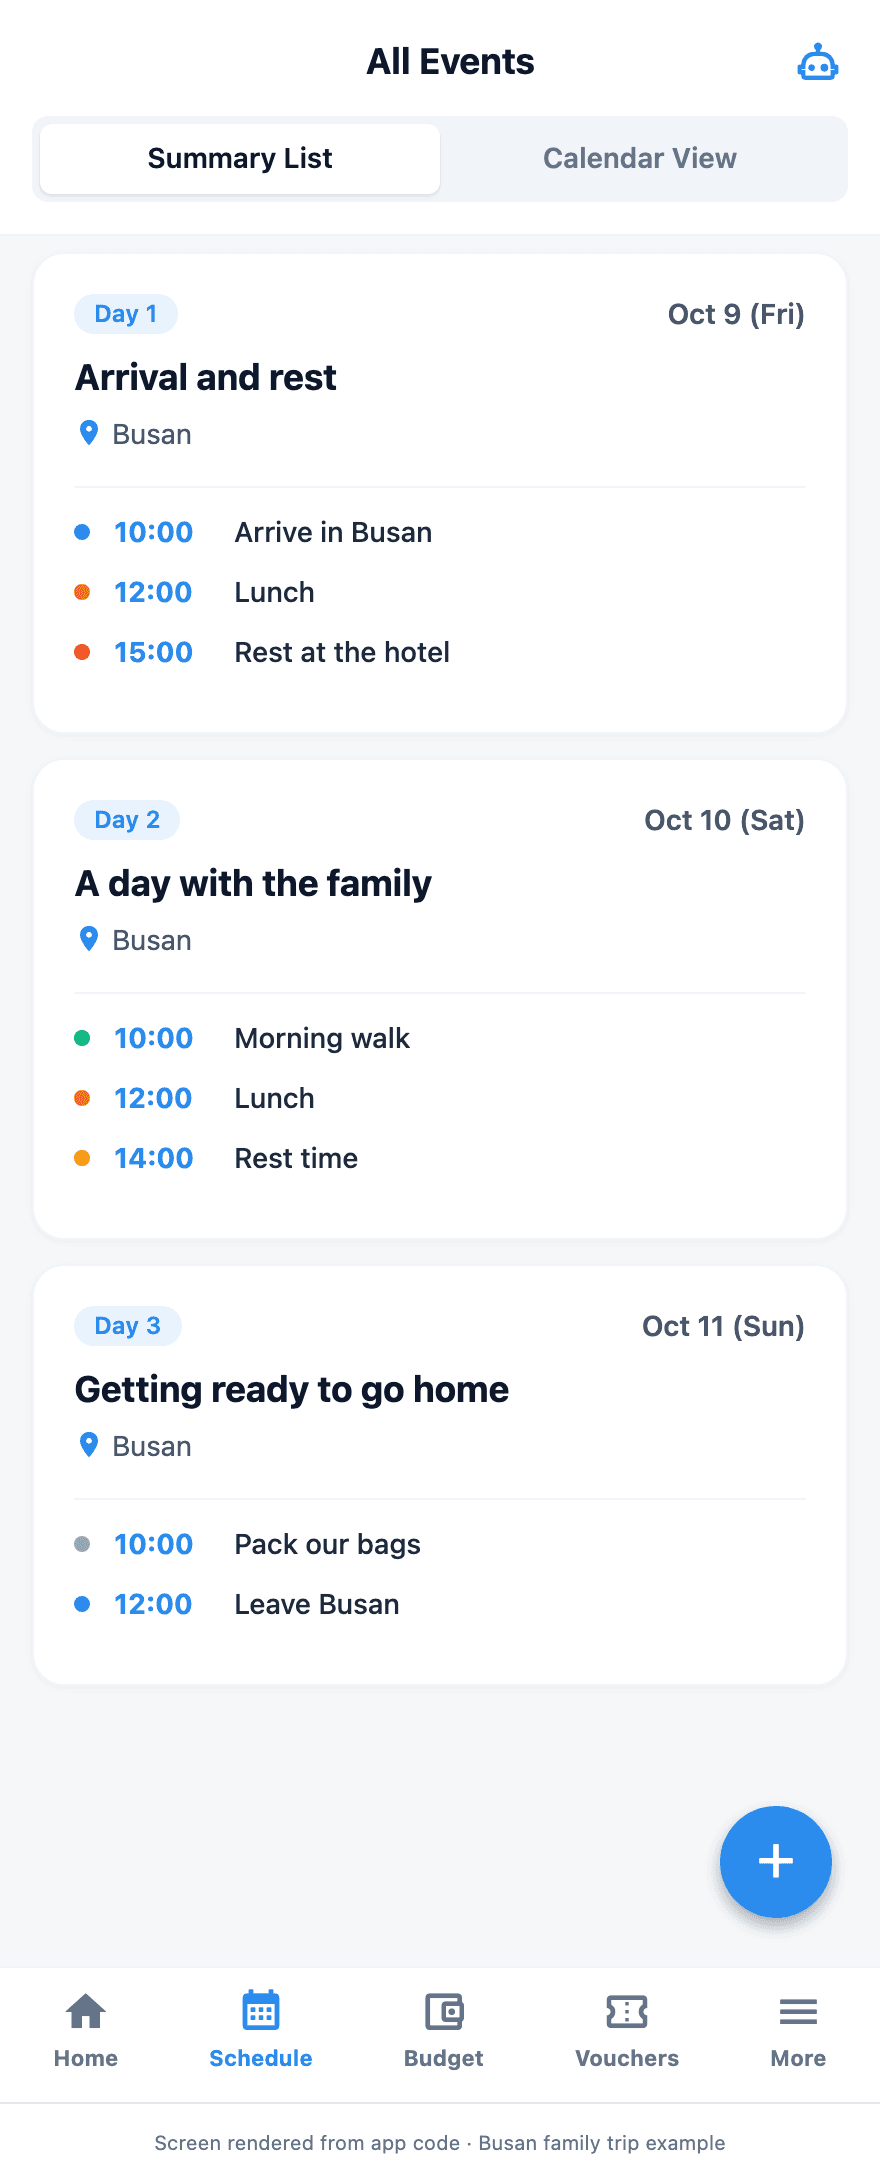
You do not have to fill a gap as soon as you notice it. If some family members want an afternoon walk while others would rather rest at the hotel, make the next meeting clear instead of trying to control everyone's separate activities. When you need to shorten the day, first check the items that are harder to change, such as bookings, then adjust the options you have not confirmed. That way, you keep more of the arrangements you have already made.
A timetable you enter does not automatically guarantee that the journeys will work. Check the actual transport and booking details, and allow more time wherever the plan would feel rushed for anyone. For more detail on places to visit in Busan and the order to travel between them, you can also refer to the Busan itinerary for two nights and three days.
If you are adding an activity to your second day in Busan, check what the reservation time means. For the Haeundae Blueline Park Sky Capsule, the booked time is an admission window, not a departure time. After entering, you wait and board in order. You could name the event “Sky Capsule admission” in the app and add a memo explaining why the next commitment should not follow immediately afterward. Check the conditions for your date in the Blueline Park visitor information.
If your family would prefer an indoor visit, put the exhibits at SEA LIFE Busan Aquarium forward as another option and ask what everyone thinks. Choose one place only if you can fit the journey there and back, including waiting time, between the meals and rest you have already planned. If that would make the day too tight, you can leave out both options. Use the Busan booking options below to compare activities like these, then check the actual product's visit date, participation requirements, and cancellation policy. Transfer only confirmed commitments into the itinerary.
4. Share according to who will read the plan and who will help edit it
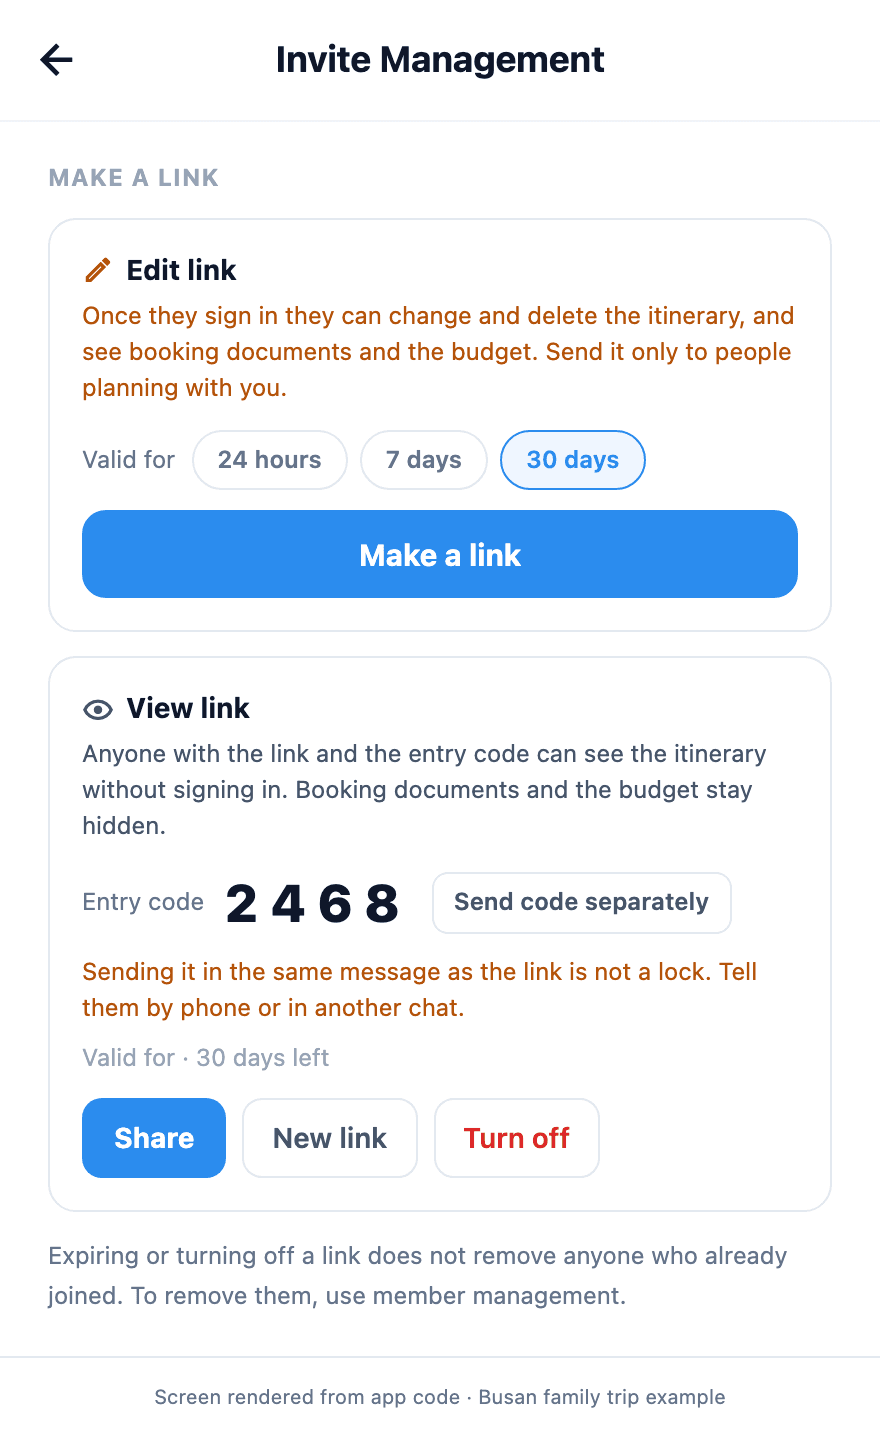
Once the trip creator has signed in and finished syncing, open More, then Invite Management, and check that the correct trip is selected. Not everyone in the family needs to change the itinerary. Choose a View link for people who only need to read the plan. For someone helping organize it, check what they will be able to access before choosing an Edit link.
| What the family member needs to do | Which option to choose | What to check before sending it |
|---|---|---|
| Look up the itinerary | View link | Recipients can read it on the web without signing in. Check the addresses and memos included in the itinerary too |
| Help edit the itinerary | Edit link | Participants must sign in and accept the terms. Check the scope of access, which also includes booking documents, the budget, and other trip information |
When making a View link, check the validity period so it will last until the end of the trip. Sharing the link and sending its entry code are separate actions. Send the link and the four-digit code separately, and tell the family group chat which day's plan to look at first. Having a code does not make it appropriate to share the contents with anyone, so agree on which family members will receive access and how much they need to see.
Do not send an Edit link casually just to get one person's opinion. First consider whether it is suitable for someone who will also have access to booking documents and the budget. A family member who only wants to suggest a restaurant can send their idea in the group chat, and the person organizing the plan can add it. Assign roles according to what each person will actually do, rather than their age.
5. Open the link once on a family member's phone
The recipient opens the View link and enters the entry code you sent separately. They can read the shared itinerary on the web without installing the app or signing in. Rather than checking only your own screen before considering the job done, ask one family member to find the first day's meeting and location on their actual phone. This helps avoid starting departure day by hunting for the link itself.
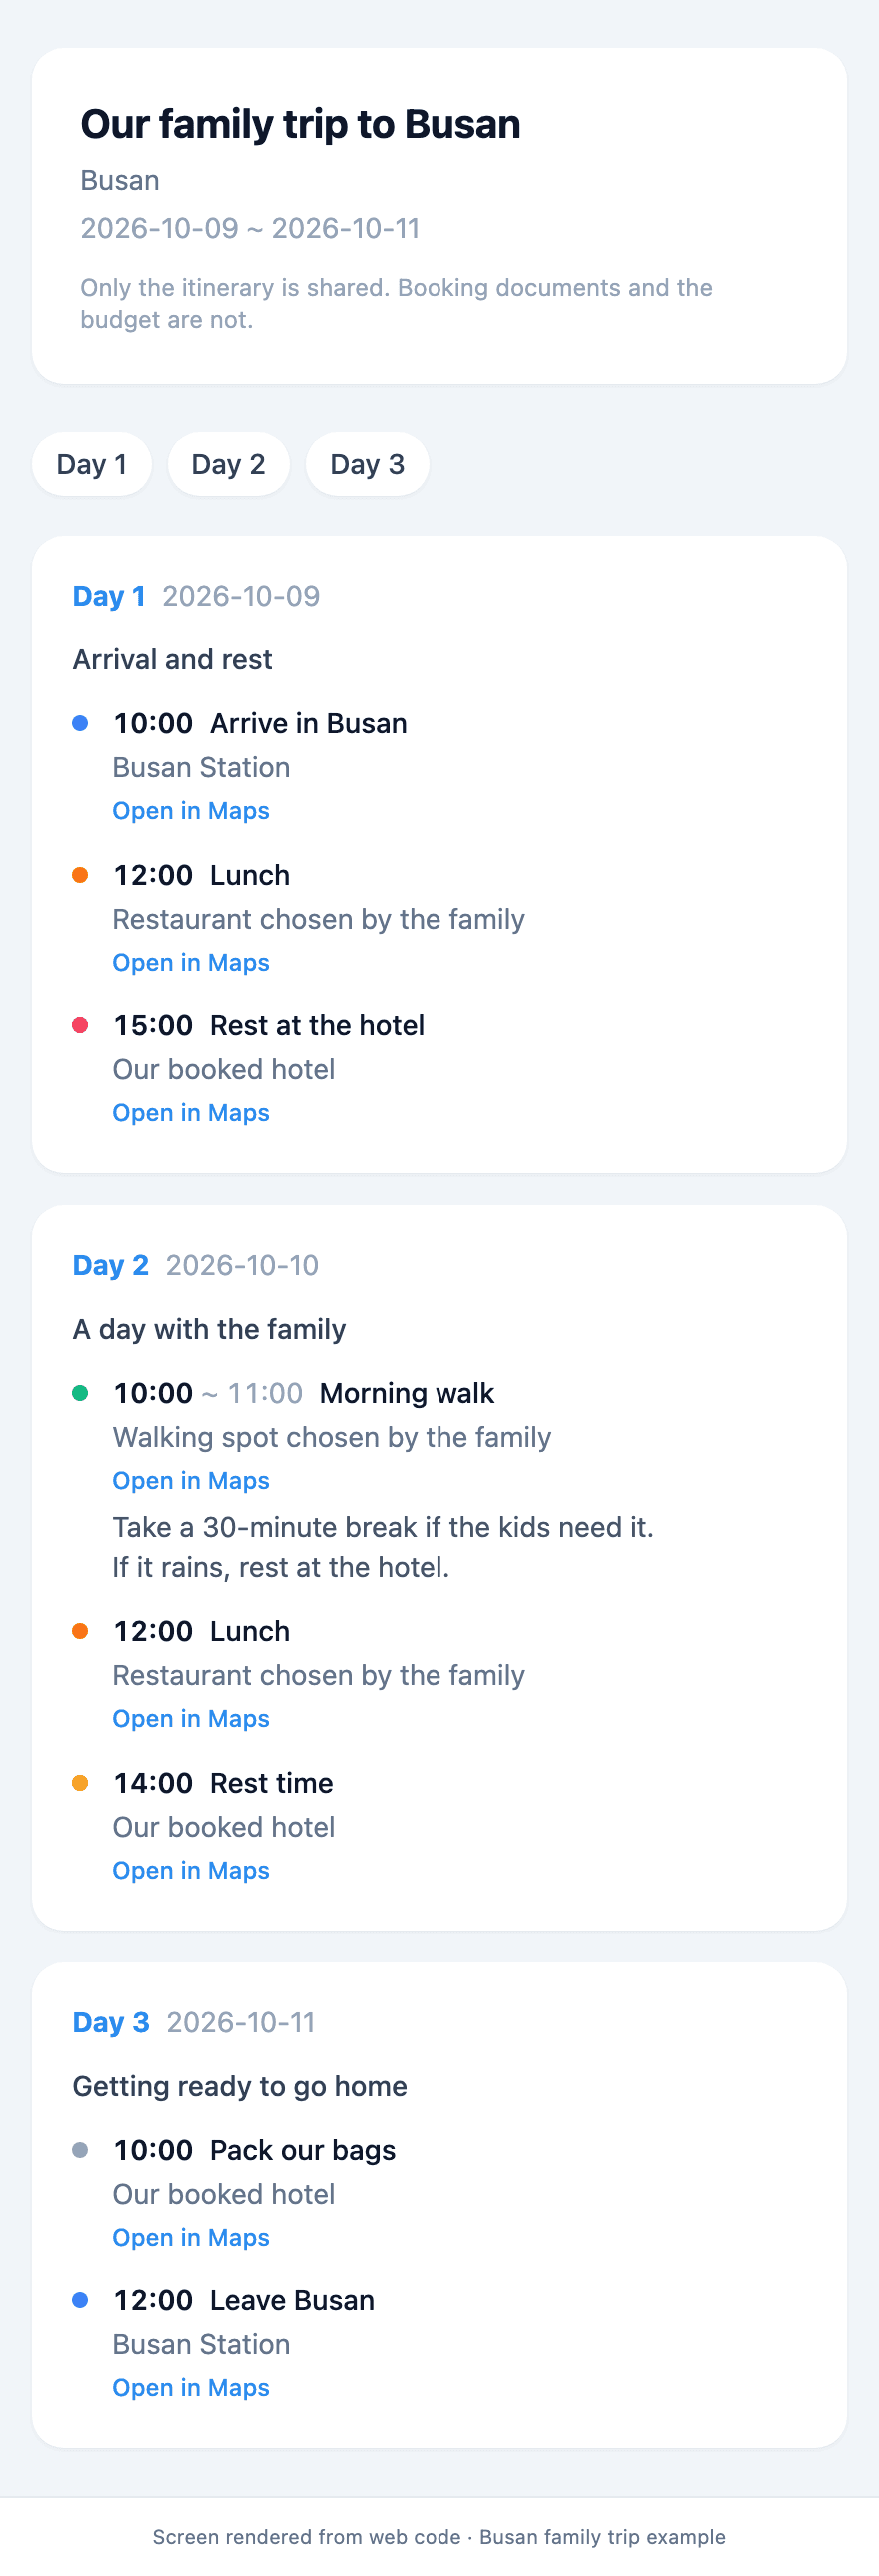
Check more than whether the page opens. Your family should be able to find the day they are joining, the first meeting place, and who to contact if a time changes. The web view does not display booking documents or the budget, but it does show memos within the itinerary, so read through them before sending it. If someone is more comfortable with a written message or a paper note, you can also give them the meeting time and address separately.
When the plan changes, sync the edits you made in the app and ask your family to reopen the link. If you expect a page they already have open to update itself, or assume they will automatically receive a change notification, people may end up following different arrangements. Start by explaining what changed: “We've moved lunch from noon to 12:30. It's the same restaurant, and I've updated the itinerary, so please open it again.”
Before you leave, check these four things together
- Are the trip name and dates correct, with a separate meeting arrangement for anyone joining later?
- Is there time to rest between journeys and meals, and have you distinguished possible activities from confirmed bookings?
- Will the link remain valid during the trip, and has a family member opened the itinerary using the code?
- Have you agreed who will update the itinerary and tell everyone when something changes?
If you are adding a family activity like those in the Busan example, compare the Busan booking options below, then check the actual visit date and participation requirements. For anything that needs to be purchased, collect the family's views before committing, then add the booking details and time to the itinerary.
You do not need to finish a packed schedule at the start. Create one trip and begin with the first day's confirmed commitments. Open that screen with your family, and you can discuss what has been decided and what still needs a conversation while looking at the same information.
→ Start planning your family trip with the Tripop app
What we verified
On September 25, 2026, the Tripop editorial team checked the instructions for creating trips, entering events, and sharing itineraries against the current product code. The conditions for the Busan activity examples were checked against the operators' official information. The illustrative screens were rendered from product code with example data; they are not records of a real family trip or of saving and sharing a trip through a live account. Menu labels may differ depending on the app version. See our editorial policy and corrections information for the scope of our checks and how to request a correction.